 Pin It
 There was this tiny pub near my college that served chili cheese fries until 2 AM on Fridays, and somehow that dish became more memorable than half my lectures. My roommate and I would split an order after late night study sessions, watching the cheese stretch while steam curled off the chili. Years later, I figured out how to recreate that magic at home, and let me tell you, hitting that perfect balance of crispy fries against rich, spiced beef chili feels like unlocking a secret level of comfort food.
Last winter during a snowstorm, my neighbor texted saying she was craving something indulgent but didnt want to drive anywhere. I whipped up a double batch of these fries, and honestly, standing over the bubbling cheese while snow piled up outside felt like the coziest moment of the whole season. We ate them straight from the baking sheet, which is honestly the best way to enjoy something this gloriously messy.
Ingredients
- 1 tablespoon olive oil: Creates the foundation for building flavor in your chili base
- 1 small onion, finely chopped: Sweetens as it cooks and provides aromatic depth to the beef
- 2 garlic cloves, minced: Add this right after the onion for that fragrant sizzle
- 250 g ground beef: The heart of your chili, brown it thoroughly for maximum flavor development
- 1 tablespoon tomato paste: Concentrates the tomato flavor and adds rich color to the sauce
- 1 teaspoon ground cumin: Earthy base note that makes it taste like proper chili
- 1 teaspoon chili powder: Provides mild warmth and that classic reddish brown hue
- 1/2 teaspoon smoked paprika: Adds subtle smokiness without needing a grill
- 1/4 teaspoon cayenne pepper: Optional heat layer, adjust based on your spice tolerance
- 400 g canned chopped tomatoes: The liquid base that carries all the spices
- 200 g canned kidney beans, drained and rinsed: Texture contrast and protein boost
- Salt and black pepper: Essential seasoning, taste and adjust as the chili simmers
- 600 g frozen French fries: Your crispy foundation, bake according to package directions
- Vegetable oil: For frying or baking the fries until perfectly golden
- 150 g shredded cheddar cheese: Sharp cheddar melts beautifully and cuts through the rich chili
- 2 spring onions, thinly sliced: Fresh bite and pop of green color against all that brown
- 1 tablespoon chopped fresh cilantro or parsley: Bright herbal finish that lightens the whole dish
- Sour cream: The cool, tangy element that balances all the warm spices
Tired of Takeout? 🥡
Get 10 meals you can make faster than delivery arrives. Seriously.
One email. No spam. Unsubscribe anytime.
Instructions
- Build your chili foundation:
- Heat that olive oil in a medium saucepan over medium heat, toss in your chopped onion, and let it soften until translucent, about 3 to 4 minutes. Add the minced garlic and stir constantly for just 30 seconds until fragrant, watching carefully so it doesnt catch and turn bitter.
- Brown the beef properly:
- Add your ground beef to the pan, breaking it apart with a wooden spoon as it cooks. Let it go for about 5 minutes until thoroughly browned, developing those little crispy bits that add so much flavor, and drain any excess fat if needed.
- Wake up the spices:
- Stir in the tomato paste, cumin, chili powder, smoked paprika, and cayenne pepper. Let everything cook together for 1 full minute, stirring constantly until the spices bloom and smell incredibly fragrant, almost toasty.
- Simmer into rich chili:
- Pour in the chopped tomatoes and add the drained kidney beans. Season with salt and pepper, bring to a gentle simmer, then reduce heat and let cook uncovered for 20 to 25 minutes. The chili should thicken noticeably, coating the back of your spoon, which means it will cling to the fries instead of sliding right off.
- Crisp the fries to perfection:
- While your chili bubbles away, cook the French fries according to package instructions. Whether baking or frying, aim for golden brown and extra crisp, because soggy fries are the tragedy that ruins this dish.
- Preheat for the final melt:
- Crank your oven to 200°C (400°F) while everything finishes cooking. You want it good and hot so the cheese melts completely and gets those gorgeous browned bubbles in just a few minutes.
- Assemble the masterpiece:
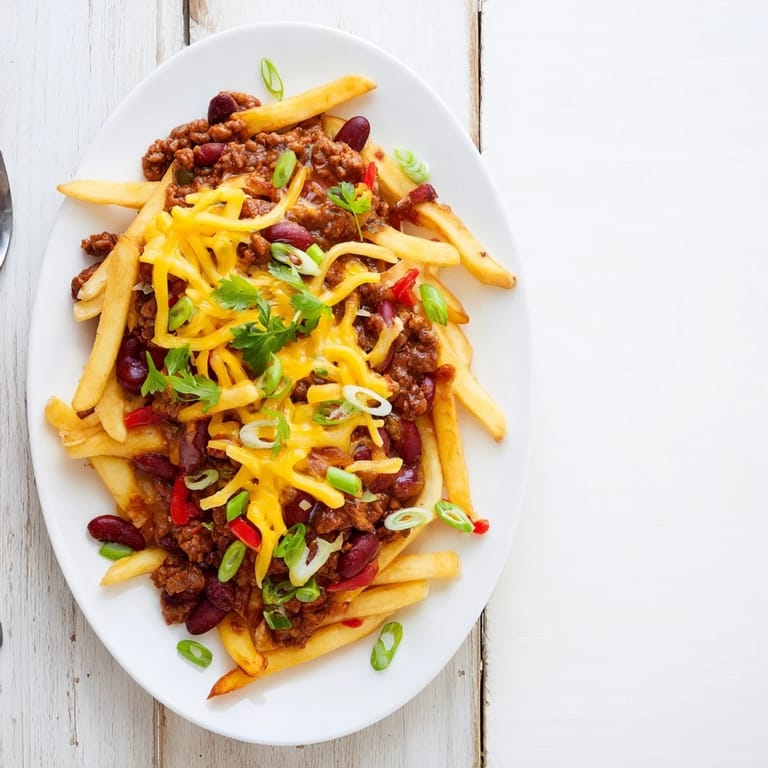
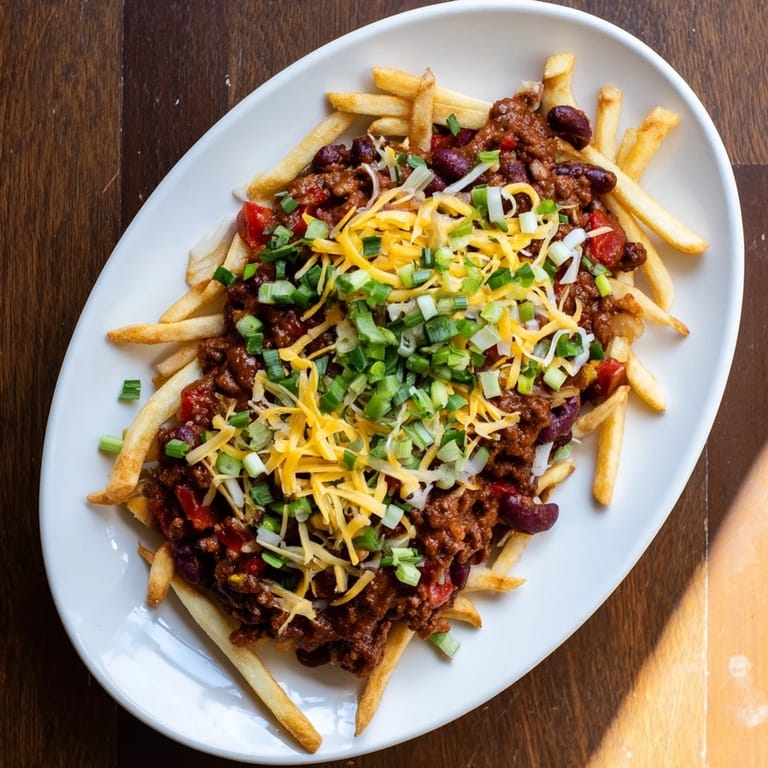
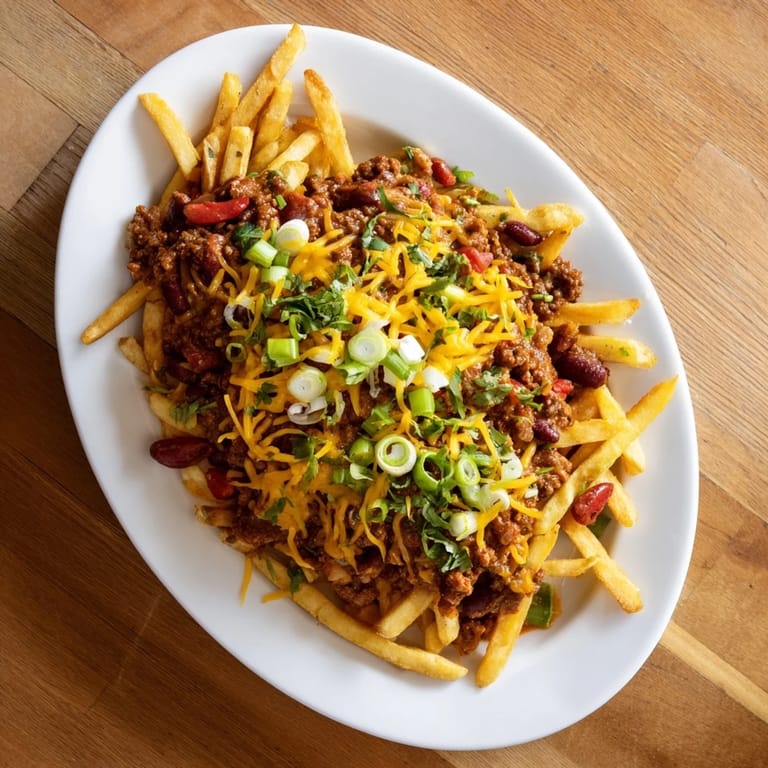
- Spread those crispy fries across a large ovenproof platter or baking sheet. Spoon your hot chili evenly over the top, making sure every fry gets some love, then sprinkle with all that shredded cheddar cheese.
- Melt and bubble:
- Bake for 5 to 7 minutes, keeping a close eye on it. You want the cheese completely melted and starting to bubble in spots, with maybe a few golden edges, but not so long that your fries lose their crunch.
- Finish with fresh touches:
- Pull it from the oven and immediately scatter with sliced spring onions and chopped cilantro or parsley. Serve right away while everything is hot, with sour cream on the side for dolloping.
 Pin It
 My teenage son claimed he wasnt hungry until the smell of chili filled the house, then suddenly appeared in the kitchen asking if he could have the first taste. Watching him sneak forkfuls while I tried to photograph the final dish reminded me that some foods are too good to wait for perfect lighting.
Making It Your Own
The beauty of this recipe is how easily it adapts to whatever craving hits you. Sometimes I swap in Monterey Jack when I want milder flavor, or pepper jack when I need more heat. The chili base works beautifully with ground turkey or plant based crumbles if you are looking to mix things up.
Serving Strategy
I have learned the hard way that individual portions work better than one giant platter when feeding a crowd. People tend to dive in at different times, and nobody wants cold cheese congealing on their fries while waiting for others to serve themselves.
Timing Is Everything
The trickiest part is getting all components hot simultaneously. I start the chili first, let it simmer while the fries cook, then time the final cheese melting step for when everyone is actually ready to eat. Nothing worse than perfectly crisp fries sitting around getting soft while someone runs late.
- Keep your baked fries in a warm oven if the chili needs more time
- Pre-shred your cheese so it melts faster and more evenly
- Have all your garnishes prepped before you start the final assembly
 Pin It
 Whether you are feeding a crowd on game day or just treating yourself on a Friday night, these chili cheese fries hit that perfect spot between comfort food and something special. Grab a fork and dig in while they are hot.
Recipe FAQs
- → Can I make these fries vegetarian?
Yes, simply replace the ground beef with plant-based mince or add extra beans and corn for a hearty vegetarian version that still delivers plenty of protein and flavor.
- → What type of cheese works best?
Sharp cheddar provides the best flavor, but Monterey Jack offers excellent melting properties. Pepper jack adds a nice kick if you enjoy some extra heat.
- → Can I prepare the chili ahead of time?
Absolutely. The chili actually tastes better the next day as flavors develop. Make it up to 2 days in advance and reheat gently before assembling the fries.
- → Should I bake or fry the French fries?
Either method works well. Frozen fries baked until crispy are convenient, but freshly fried potatoes yield the best crunch. Choose based on your preference and equipment.
- → How can I make these spicier?
Add jalapeño slices, increase the cayenne pepper, or drizzle hot sauce over the finished dish. You can also use pepper jack cheese instead of regular cheddar.
- → What else can I top these fries with?
Sour cream adds a cooling contrast, while pickled jalapeños, bacon bits, diced tomatoes, or guacamole all make excellent additions to customize your loaded fries.