 Pin It
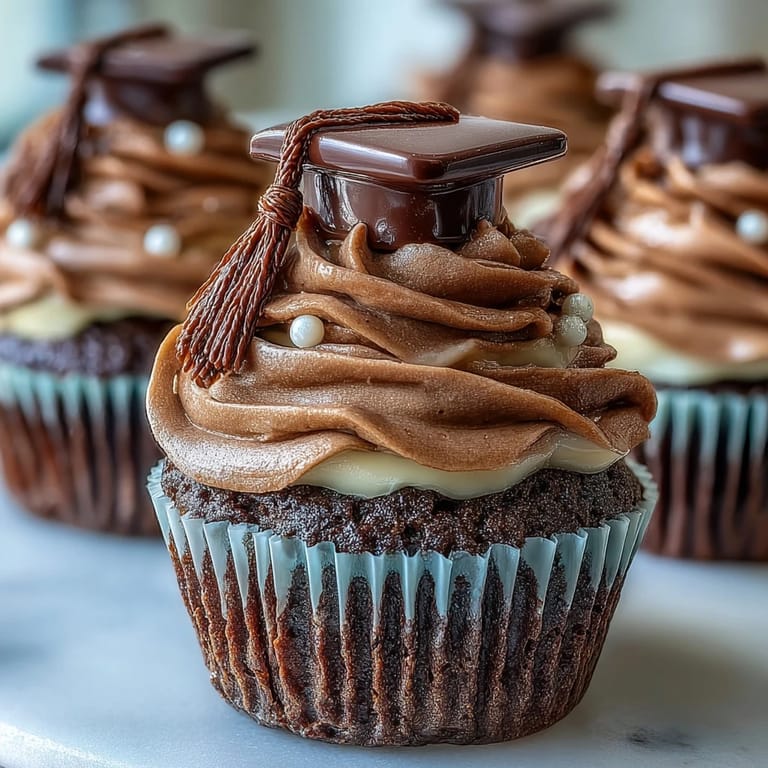
 My cousin texted me three weeks before her graduation asking if I could bring desserts to her party, and I immediately thought of these little cakes with the tiny caps on top. There's something about edible graduation hats that just makes people smile the moment they see them, and honestly, they're so simple to assemble that even my disaster-prone baking attempts turned out beautifully. The first batch I made, I was rushing between work calls and somehow managed to frost them without getting buttercream in my hair, which felt like a personal victory. These cupcakes became the thing people asked about more than the actual cake.
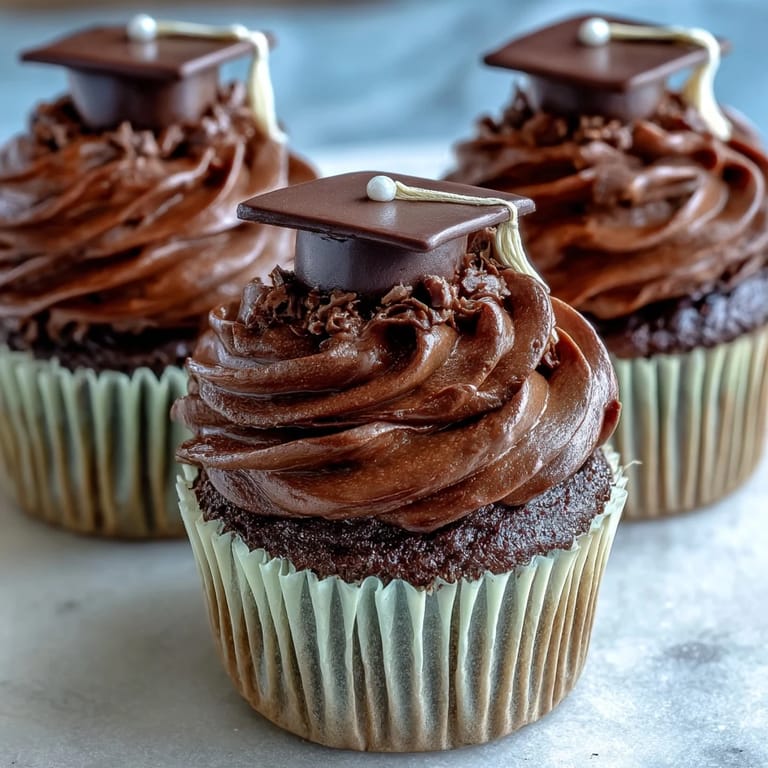
I'll never forget the moment my cousin's roommate bit into one of these at the graduation party and her eyes went wide because the little peanut butter cup inside the cap was like a tiny surprise. Everyone started comparing their toppers, seeing whose had the fanciest tassel, and suddenly these simple cupcakes became an interactive part of the celebration instead of just something to eat. That's when I realized these aren't just desserts; they're tiny edible party favors that make people feel like their achievement matters.
Ingredients
- All-purpose flour: The foundation that keeps these cupcakes tender without being dense, and measuring by weight rather than scooping prevents that common mistake of compacting too much flour.
- Granulated sugar and powdered sugar: Granulated sweetens the cake and granulated sugar in the frosting keeps it stable, while powdered sugar creates that silky texture that pipes beautifully.
- Unsalted butter: Using unsalted lets you control the salt level and keeps the crumb structure fine and even throughout.
- Eggs: These bind everything together and create lift when beaten properly, so don't skip the creaming step at the beginning.
- Whole milk: The liquid that keeps the batter moist without making it dense, and whole milk specifically creates a richer crumb than water ever could.
- Baking powder: This is your rise guarantee, so make sure it's fresh because old baking powder is basically flour with no lifting power.
- Vanilla extract: The ingredient that pulls all the flavors together into something that tastes homemade rather than from a box.
- Mini peanut butter cups: The hidden treasure that makes the cap toppers work, though chocolate squares work just as well if allergies are a concern.
- Chocolate square candies: These form the base of your cap and need to be flat so they sit securely on top of each cupcake.
- Licorice or sour candy strips: Your tassel that hangs down from the cap, and honestly the bright colors are half the charm.
- Mini M&Ms or candy pearls: The tiny button that secures the cap and adds a finished, polished look to the whole creation.
Tired of Takeout? 🥡
Get 10 meals you can make faster than delivery arrives. Seriously.
One email. No spam. Unsubscribe anytime.
Instructions
- Set the stage:
- Preheat your oven to 350°F and line your muffin tin with paper liners while you gather everything else. This takes two minutes and prevents that panic moment where you realize your oven isn't ready and your batter is sitting there oxidizing.
- Cream the butter and sugar:
- Beat the softened butter and sugar together until it looks pale and fluffy, which should take about two to three minutes with an electric mixer. This step is where you're incorporating air into the batter, and you'll see the mixture literally transform from dense and yellow to light and creamy.
- Add the eggs:
- Beat in each egg separately, making sure each one is fully incorporated before adding the next, then stir in the vanilla. If you dump all the eggs in at once, the mixture can look curdled and wrong, but beat them in one at a time and it stays smooth and beautiful.
- Mix the dry ingredients:
- In a separate bowl, whisk together the flour, baking powder, and salt so the baking powder distributes evenly. This prevents those random pockets of baking powder that taste metallic and unpleasant.
- Combine wet and dry:
- Add half the dry mixture to the butter mixture and stir gently, then add the milk, then the remaining dry ingredients, stirring just until combined. Over-mixing at this point develops gluten and makes your cupcakes tough and bouncy instead of tender.
- Fill and bake:
- Divide the batter evenly among your liners and bake for eighteen to twenty minutes until a toothpick poked in the center comes out clean. The cupcakes should spring back slightly when you gently press the top, and they'll smell buttery and vanilla-sweet when they're ready.
- Cool completely:
- Let the cupcakes cool in the tin for a few minutes, then turn them out onto a wire rack to cool all the way down. Frosting warm cupcakes is a lesson in frustration and melted frosting, so patience here saves you from tears later.
- Make the frosting:
- Beat the softened butter until it's smooth and creamy, then gradually add the powdered sugar so you don't create a cloud of sugar all over your kitchen. Add the milk, vanilla, and salt, then beat until it's light and fluffy enough to spread or pipe.
- Frost the cupcakes:
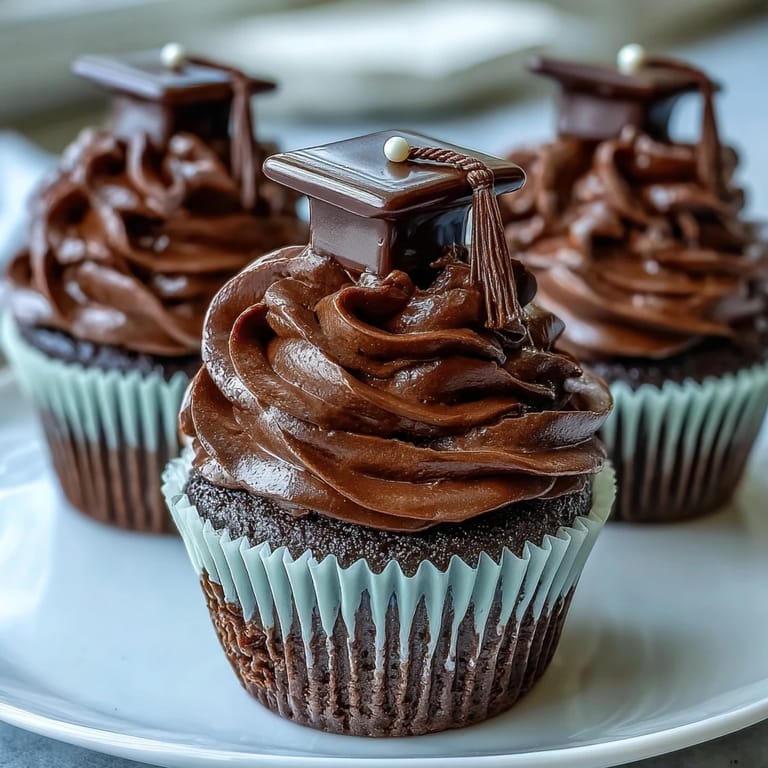
- Swirl the buttercream onto each cooled cupcake using a spatula or piping bag, creating a little peak in the center where the cap will sit. The frosting acts as the glue that holds the cap toppers secure, so don't skip this or your caps will topple over.
- Assemble the cap toppers:
- Start with a chocolate square flat-side up, then dab a tiny bit of melted chocolate or frosting in the center and press the mini peanut butter cup upside-down on top. Attach the licorice tassel to one corner with a dab of chocolate, then secure the M&M or pearl as the button on the center of the cup, and let everything set for a few minutes.
- Crown your cupcakes:
- Once the caps are set and won't slide around, carefully press each one onto the frosted cupcake. The frosting underneath acts as your anchor, and the weight of the cap helps it stay put through transportation and display.
 Pin It
 There was a moment at that graduation party when a little kid pointed at the cupcakes and shouted, "They're wearing hats!" and every single adult turned to look and smiled. It reminded me that sometimes the most meaningful food is the kind that makes people feel like someone went out of their way just to celebrate them, even if that way is actually pretty simple.
Customizing Your Caps for School Spirit
One of the best parts about these toppers is that they're completely customizable, and your color choices can make them feel personal instead of generic. If you know the graduate's school colors, you can tint the buttercream frosting to match using gel food coloring, which won't change the consistency the way liquid coloring does. You could also use colored licorice for the tassels if your local store carries it, or even wrap a thin ribbon around the chocolate square base to add an extra touch.
Making Ahead and Storage Strategies
These cupcakes are actually one of the few desserts that genuinely improve when you make them a day ahead because the crumb has time to set and they stay moist and delicious. You can bake and frost the cupcakes completely, keep them in an airtight container at room temperature, and then assemble the caps the morning of your event. This takes the stress out of party day and means you can focus on other details instead of racing against your oven schedule.
Troubleshooting Your Cupcake Moment
If your frosting looks grainy or separated, don't panic because it usually means the butter was too cold when you started beating in the sugar. Just let it sit at room temperature for a few minutes and keep beating, and it'll smooth back out as the butter warms up. If your cupcakes come out dry or dense, the culprit is usually over-mixing the batter, so next time remember that you're going for just-combined, not smooth like cake batter at a bakery.
- If your cap toppers slide around on the frosting, make sure your frosting is thick enough and chill the cupcakes for fifteen minutes after frosting to give the buttercream time to set.
- Licorice pieces can stick to your fingers when you're trying to attach them, so keep them cool and use a quick pressing motion rather than fumbling around.
- If you need these cupcakes completely nut-free, read every candy label because chocolate squares and M&Ms can sometimes be produced on shared equipment, so trust the packaging over assumptions.
 Pin It
 These cupcakes have become my go-to celebration dessert because they bridge the gap between simple and special in a way that feels genuine. They prove you don't need complicated techniques or hours in the kitchen to make someone feel like their achievement actually matters.
Recipe FAQs
- → What ingredients create the cupcake base?
The base combines all-purpose flour, granulated sugar, unsalted butter, eggs, whole milk, baking powder, salt, and vanilla extract for a tender vanilla-flavored cake.
- → How is the buttercream frosting made?
Softened butter is beaten smooth before gradually adding sifted powdered sugar, milk, vanilla extract, and a pinch of salt to achieve a fluffy, spreadable frosting.
- → What are the edible cap toppers composed of?
They consist of chocolate square candies, mini peanut butter cups or nut-free chocolate squares, licorice strips for tassels, candy pearls or mini M&Ms for buttons, assembled with melted chocolate or frosting.
- → Can these cupcakes be adapted for nut allergies?
Yes, nut-free chocolate squares replace peanut butter cups to accommodate allergies, ensuring all can enjoy the festive decoration safely.
- → How should cupcakes be stored after decorating?
Store in an airtight container at room temperature for up to two days to maintain freshness and texture.
- → What tools are needed for preparation?
A muffin tin lined with paper liners, mixing bowls, an electric mixer, spatula, and a piping bag or spoon for frosting are required for assembling these cupcakes.