 Pin It
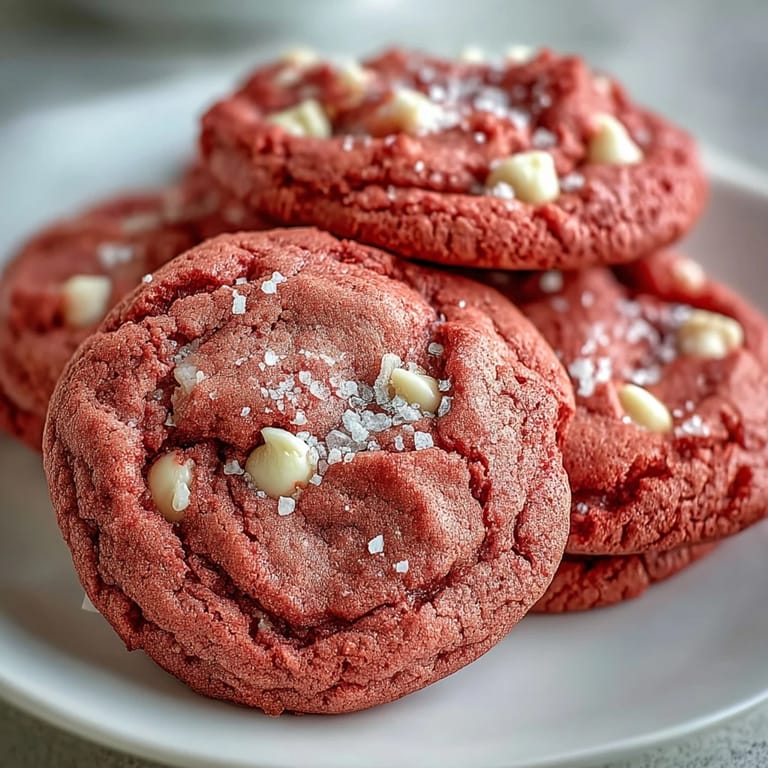
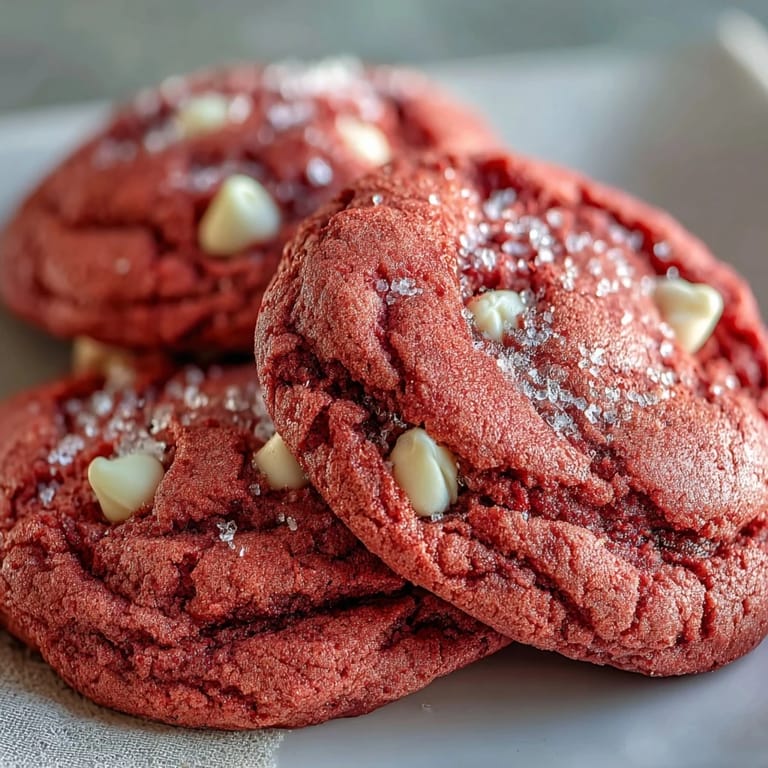
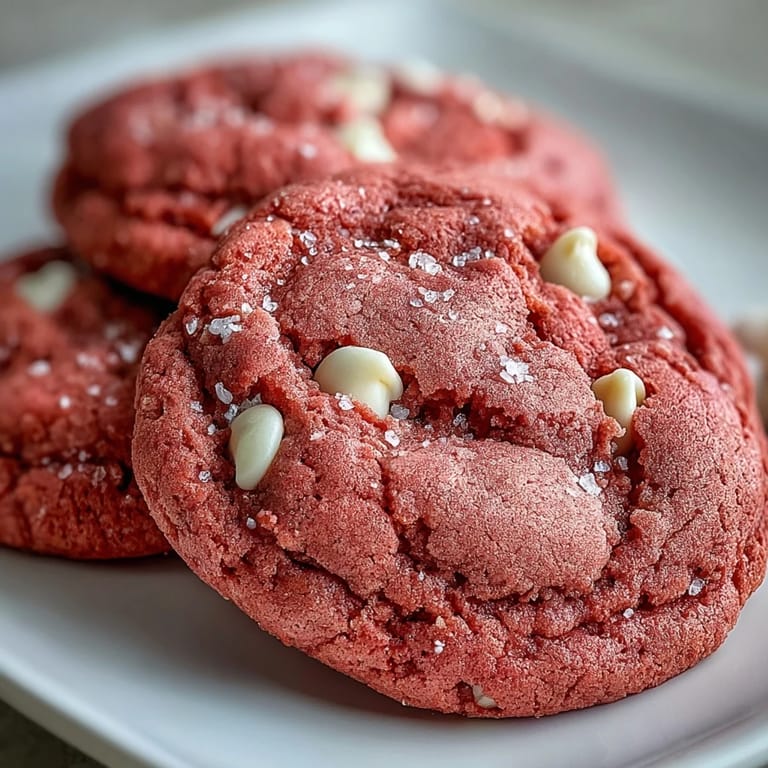
 The mixing bowl was streaked with the brightest pink I'd ever seen, and I thought I'd gone too far with the food coloring. But when those cookies came out of the oven, still soft in the center with little pools of melted white chocolate, I knew I'd stumbled onto something special. My daughter stood on her tiptoes at the counter, eyes wide, asking if we could make them every week. That's how Pink Velvet Cookies became our Saturday tradition.
I brought a batch to a baby shower last spring, stacked in a clear jar tied with ribbon. Three different guests asked for the recipe before I even sat down. One friend admitted she thought they were store-bought at first because the color looked so professional. The truth is, gel food coloring does all the work, you just need to trust the process and not panic when the dough looks neon in the bowl.
Ingredients
- All-purpose flour: The foundation that gives these cookies their tender structure, measure it correctly by spooning into the cup and leveling off.
- Baking powder and baking soda: This duo creates the perfect rise and chewiness, don't skip the baking soda or they'll spread too thin.
- Unsalted butter: Must be softened to room temperature so it creams properly with the sugar, creating that fluffy base.
- Granulated sugar: Creaming it with butter incorporates air and gives the cookies their light texture.
- Egg: Binds everything together and adds moisture, one large egg at room temperature works best.
- Vanilla extract: Adds warmth and depth, pure extract makes a noticeable difference over imitation.
- Pink gel food coloring: Gel is key here because liquid coloring will throw off the dough consistency and give you pale cookies.
- White chocolate chips: They melt into creamy pockets and their sweetness complements the vanilla beautifully.
Tired of Takeout? 🥡
Get 10 meals you can make faster than delivery arrives. Seriously.
One email. No spam. Unsubscribe anytime.
Instructions
- Prep the dry mix:
- Whisk the flour, baking powder, baking soda, and salt in a bowl until no streaks remain. This step ensures even distribution so you don't get pockets of leavening.
- Cream butter and sugar:
- Beat them together for a full 2 to 3 minutes until the mixture turns pale and fluffy like frosting. This is where the cookies get their structure, so don't rush it.
- Add egg and color:
- Beat in the egg and vanilla until smooth, then squeeze in the pink gel food coloring. Mix until the color is even and vibrant, adding more gel if you want a deeper shade.
- Combine with flour:
- Add the dry ingredients gradually on low speed, mixing just until no white streaks are visible. Overmixing will make tough cookies instead of tender ones.
- Fold in chocolate:
- Use a spatula to gently fold in the white chocolate chips, distributing them evenly without crushing. This keeps them whole so they create those pretty melty spots.
- Chill the dough:
- Cover the bowl tightly with plastic wrap and refrigerate for 30 minutes. Cold dough holds its shape better and prevents the cookies from spreading into flat pancakes.
- Prepare for baking:
- Preheat your oven to 350°F and line two baking sheets with parchment paper. This prevents sticking and ensures even browning on the bottoms.
- Shape the cookies:
- Scoop tablespoon-sized portions of dough and roll them lightly between your palms. Space them 2 inches apart because they will spread as they bake.
- Bake to perfection:
- Bake for 10 to 12 minutes until the edges look set but the centers still seem soft and slightly underdone. They'll firm up as they cool, trust me on this.
- Cool properly:
- Let the cookies sit on the baking sheet for 5 minutes to set, then move them to a wire rack. This two-stage cooling prevents them from breaking and keeps the bottoms from getting soggy.
 Pin It
 My neighbor once told me these cookies reminded her of the strawberry shortcake ice cream bars she ate as a kid. That wasn't what I was going for, but it made me realize that pink desserts carry their own kind of nostalgia. Now when I make them, I think about all the birthday parties and picnics and quiet afternoons they've brightened. Food has a way of holding memories like that, even when you're just making cookies on a Tuesday.
How to Get the Perfect Pink Shade
Start with less gel coloring than you think you need, about a teaspoon, and add more gradually. The color deepens as you mix and will look more vibrant once baked. I learned this after making a batch that looked like highlighter pink in the bowl but turned out beautifully rosy in the oven. If you're going for a pastel look, a few drops will do, but for that bold hot pink, don't be shy about adding another squeeze or two.
Storage and Make-Ahead Tips
These cookies stay soft in an airtight container for up to a week, layered between parchment paper to keep them from sticking. The dough can be made ahead and refrigerated for up to 3 days or frozen for 2 months, just let it sit at room temperature for 10 minutes before scooping. I often make a double batch, bake half, and freeze the rest of the dough in pre-scooped balls so I can bake fresh cookies whenever the craving hits. Baked cookies also freeze beautifully for up to 3 months, just thaw them at room temperature and they taste like they just came out of the oven.
Creative Variations to Try
For a fun twist, swap half the white chocolate chips for freeze-dried strawberries crushed into small pieces, they add a tart fruity pop that's amazing. A few drops of almond extract in place of some vanilla gives them a delicate bakery-style flavor. If you want to go full dessert mode, sandwich two cooled cookies with cream cheese frosting or buttercream and roll the edges in sprinkles.
- Press a few extra white chocolate chips on top of each dough ball before baking for a bakery-pretty finish.
- Add a pinch of cardamom to the dough for a subtle warmth that surprises everyone.
- Drizzle cooled cookies with melted white chocolate and dust with edible glitter for special occasions.
 Pin It
 There's something joyful about a cookie that doesn't take itself too seriously, and these fit the bill perfectly. Whether you're baking them for a crowd or just because you need something sweet and pretty on a gray afternoon, they deliver every time.
Recipe FAQs
- → Why do I need to chill the dough?
Chilling prevents excessive spreading during baking, ensuring thick, soft cookies with perfect texture. Thirty minutes in the refrigerator firms the butter, helping the treats hold their shape while maintaining chewy centers.
- → Can I use liquid food coloring instead of gel?
Gel coloring provides vibrant pink hue without altering dough consistency. Liquid coloring works but may require additional flour to compensate for extra moisture, potentially affecting the final texture.
- → How do I know when the cookies are done?
Bake until edges appear set and slightly golden while centers still look soft and underbaked. The cookies continue firming on the baking sheet during the five-minute cooling period, achieving that perfect chewy texture.
- → Can I freeze the dough or baked cookies?
Scoop raw dough onto parchment-lined trays, freeze until solid, then transfer to freezer bags for up to three months. Bake from frozen, adding one to two minutes. Baked cookies freeze well for up to two months.
- → What's the best way to store these cookies?
Keep completely cooled treats in an airtight container at room temperature for up to one week. For extended freshness, layer with parchment paper to prevent sticking. Avoid storing while warm, as condensation makes them soggy.
- → Can I make these gluten-free?
Substitute all-purpose flour with a reliable 1:1 gluten-free baking blend containing xanthan gum. The texture remains remarkably similar, though chilling time may increase slightly to help the alternative flour hydrate properly.