 Pin It
 My friend Sarah's daughter was graduating, and instead of ordering from some fancy bakery, Sarah decided she wanted to make the cake herself. She called me in a mild panic three days before the party, asking if I could help her pull off a two-tier masterpiece with those adorable balloon toppers she'd seen online. What started as an afternoon of flour-dusted chaos and laughter became one of those kitchen moments where everything just clicks, and suddenly you're standing back admiring this elegant, celebratory cake that you actually made with your own hands.
I'll never forget watching Sarah's hands shake a little as she positioned those balloon toppers on top of the stacked tiers. Her daughter walked into the kitchen, saw the cake, and just stopped—completely silent for a moment. Then she hugged her mom, and honestly, that hug was worth every bowl and spatula we'd washed. That's when I realized this cake wasn't just dessert; it was a tangible expression of love wrapped up in buttercream.
Ingredients
- All-purpose flour: The backbone of your sponge—makes sure it's fresh and aerated by sifting it with the baking powder and salt together.
- Baking powder: Don't skip the whisking step; distributing it evenly means your cake rises evenly instead of doming like a lopsided hill.
- Granulated sugar: Beat this with butter long enough for the mixture to turn pale and fluffy; this is where you trap air that keeps your cake light.
- Unsalted butter, room temperature: Cold butter won't cream properly, so pull it out of the fridge at least an hour before you start mixing.
- Large eggs, room temperature: These emulsify better and create a more stable batter when they're not straight from the fridge.
- Pure vanilla extract: The real stuff makes an actual difference in flavor; the imitation version tastes slightly chemical by comparison.
- Whole milk, room temperature: Cold milk can seize the batter, so let it sit out while you're creaming your butter and sugar.
- Unsalted butter for frosting: Same deal—room temperature is non-negotiable for a smooth, spreadable consistency.
- Powdered sugar: Sift it before measuring or your frosting will taste gritty instead of silky.
- Milk or heavy cream: Add it gradually; you want frosting that's creamy but still holds its shape when piped.
- Gel food coloring: Way better than liquid coloring because it won't thin out your frosting and you can match school colors perfectly.
- Balloon toppers: Hunt these down online or make them yourself with food-safe sticks and mini balloons for that personal touch.
Tired of Takeout? 🥡
Get 10 meals you can make faster than delivery arrives. Seriously.
One email. No spam. Unsubscribe anytime.
Instructions
- Set up your baking station:
- Preheat your oven to 350°F and grease those four cake pans like your life depends on it—use butter or non-stick spray, then line the bottoms with parchment paper so nothing sticks. This step feels tedious but trust me, it saves heartbreak when you're trying to flip a cake out of the pan.
- Mix your dry ingredients:
- Whisk flour, baking powder, and salt in a medium bowl until they're evenly combined and you can't see any streaks. This distributes the leavening agent so your cake doesn't have weird dense pockets.
- Cream butter and sugar:
- In a large bowl, beat butter and sugar for 3 to 5 minutes until the mixture is pale, fluffy, and almost doubled in volume. You're literally incorporating air bubbles that will make your cake rise and stay tender.
- Add eggs one at a time:
- Drop in one egg, beat until it's fully incorporated, then repeat with the rest. This patience prevents the batter from looking curdled or separating, which would give you a grainy crumb.
- Mix in vanilla:
- Pour in the vanilla extract and beat until it's distributed throughout the batter, which takes maybe 30 seconds.
- Alternate wet and dry ingredients:
- On low speed, add a third of the flour mixture, then half the milk, then another third of flour, then the remaining milk, and finish with the last of the flour. This method prevents overmixing and keeps your cake tender instead of tough.
- Divide and fill pans:
- Distribute the batter evenly among your four pans—you want them to bake at the same rate and rise to roughly the same height. Tap each pan gently on the counter a few times to release trapped air bubbles.
- Bake with attention:
- The 8-inch cakes need 35 to 40 minutes, and the 6-inch cakes 25 to 30 minutes; start checking at the lower time by inserting a toothpick in the center. When it comes out clean or with just a few crumbs, they're done.
- Cool properly:
- Let cakes rest in their pans for 10 minutes to set slightly, then turn them out onto wire racks to cool completely, which takes about an hour. Frosting warm cakes results in melted, sliding frosting that looks amateur.
- Make your buttercream:
- Beat room-temperature butter until it's creamy and pale, then add your sifted powdered sugar gradually while beating, which prevents lumps. Once it looks like frosting, add vanilla, salt, and milk one tablespoon at a time until you get the right consistency for spreading and piping.
- Level your layers:
- If your cakes have domed tops, carefully trim them with a serrated knife to create flat surfaces that stack stably. This might seem like extra work, but unleveled cakes look sloppy and can slide around.
- Build the tiers:
- Place one 8-inch cake on a cake board, spread buttercream on top, then stack the second 8-inch cake; repeat with your 6-inch cakes. Let these set in the fridge for 15 minutes before applying the crumb coat.
- Apply crumb coat:
- Spread a thin layer of frosting over both cakes to seal in any loose crumbs, then chill for 20 minutes; this ensures your final frosting layer looks smooth and professional. Skipping this step means crumbs mixed into your frosting, which looks messy.
- Final frosting:
- Apply your remaining buttercream in smooth, generous layers over both cakes, using an offset spatula and rotating your cake turntable if you have one. Take your time here; messy frosting is the only thing that will show.
- Stack safely:
- Center the 6-inch cake on top of the 8-inch cake and use cake dowels or hollow straws inserted vertically through the bottom tier to support the weight. If you skip this, the top tier will slowly sink into the bottom one during the party.
- Decorate:
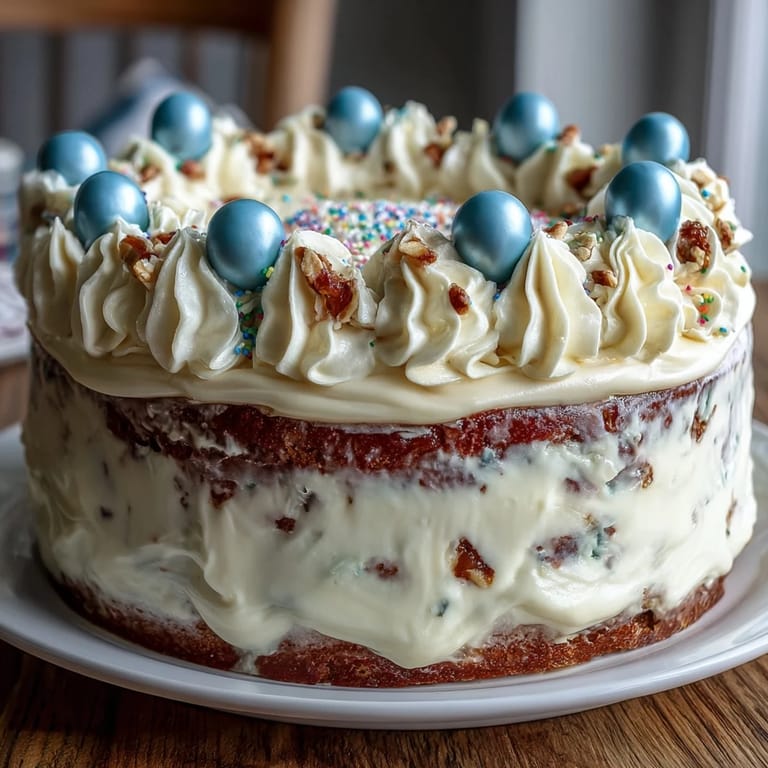
- Position your balloon toppers on the top tier and scatter edible confetti or sprinkles wherever they look good. Step back and admire what you've made.
 Pin It
 A week after the graduation party, Sarah texted me a photo of her daughter wearing a t-shirt from her university with a slice of cake on it—apparently it was such a good cake that the birthday girl joked about it being her best graduation gift. That's when I understood that the real magic wasn't in the fancy technique or perfect frosting; it was in showing up for someone you love and creating something beautiful they'd actually remember.
Getting Your Timing Right
The hardest part of this cake isn't the baking—it's managing the timeline so everything comes together smoothly. I learned this the messy way when I tried to frost the cakes while they were still slightly warm, and the buttercream turned into pudding. The whole process takes about two hours from oven to finished cake, but if you bake the day before and assemble the morning of your event, you'll have way less stress and a cake that holds up beautifully through the celebration.
Customizing for Your Graduate
One of the best parts about this cake is how easily it bends to whoever you're celebrating. Sarah tinted half her frosting with her daughter's school colors—a gorgeous deep blue and gold—and it instantly felt personal instead of generic. You could swap the vanilla extract for almond or lemon if you want a different flavor profile, or add edible glitter instead of confetti, or even pipe your graduate's name or year onto the frosting if you're feeling confident. The balloon toppers are the real showstopper, and hunting down ones that match the occasion feels like you're adding one more layer of celebration.
- Tint your frosting with gel food coloring for vibrant, school-spirit colors that won't thin out the frosting like liquid coloring does.
- Practice piping on a piece of parchment paper before decorating the actual cake if you've never used a piping bag before.
- Order balloon toppers a week in advance so you're not scrambling the night before and ending up with whatever's left in stock.
Storing and Serving This Cake
The frosted, decorated cake will hold beautifully at room temperature for up to four hours, which covers most parties perfectly. If you're making it further in advance or it's warm outside, refrigerate it in a cake box so the frosting doesn't pick up fridge smells, and let it come to room temperature for 30 minutes before serving so the cake isn't cold and dense. Leftover slices keep in an airtight container in the fridge for three days, and honestly, cold cake the next morning tastes even better than the day you made it.
 Pin It
 There's something deeply satisfying about making a two-tier cake from scratch for someone you care about. It tells them you see them, you believe in them, and you're willing to spend your time in the kitchen making something beautiful just for their moment.
Recipe FAQs
- → What type of flour is best for the vanilla sponge?
All-purpose flour provides the ideal texture for a soft and moist sponge suitable for layering and stacking.
- → How do I ensure the layers bake evenly?
Use pans of equal depth, line them with parchment paper, and avoid overfilling. Bake different sizes separately and check with a toothpick.
- → What is the purpose of the crumb coat in frosting?
The crumb coat seals in loose crumbs and helps achieve a smooth final frosting layer for a polished finish.
- → Can the balloon toppers be homemade?
Yes, small balloons attached to food-safe sticks can be crafted to create customized decorative toppers.
- → How long should the cake chill before stacking?
Chilling the crumb-coated layers for about 20 minutes helps stabilize the frosting and prevents shifting during assembly.