 Pin It
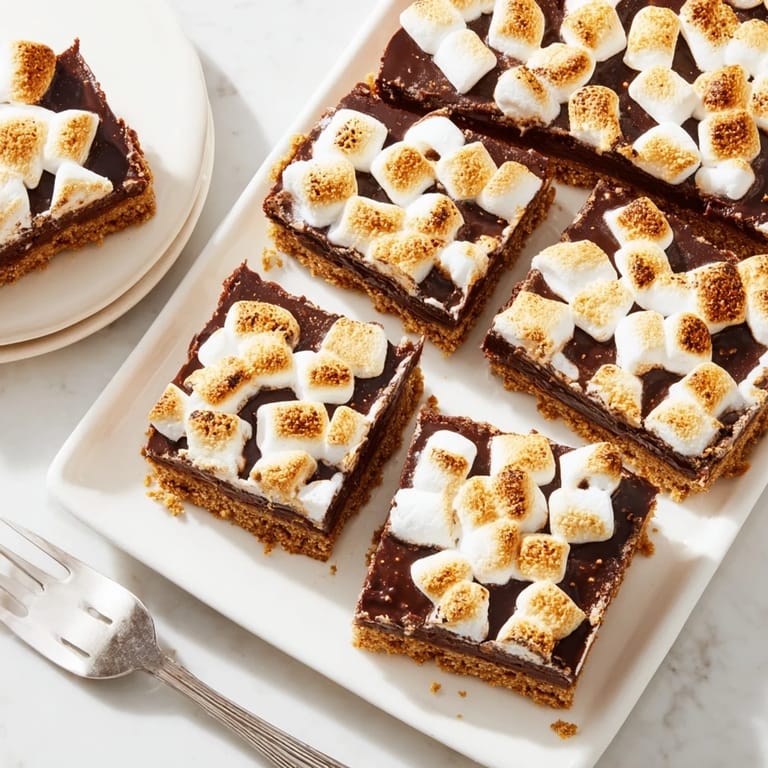
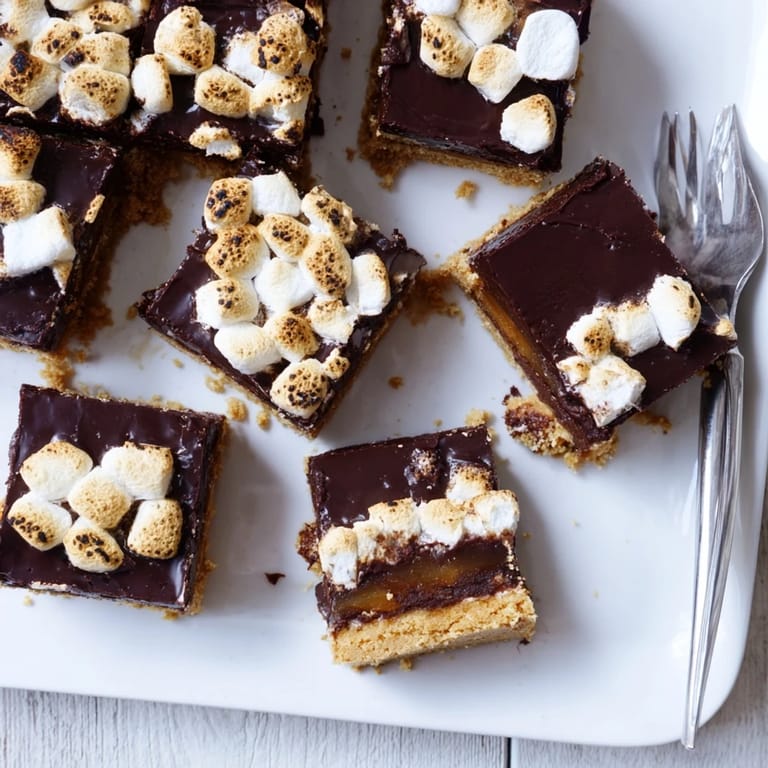
 My daughter announced she wanted s'mores in January, and I stood there staring at three feet of snow outside the kitchen window. Instead of disappointing her, I decided to bring the campfire magic inside. These bars ended up being even better than the original version, mostly because we didn't have to battle mosquitoes while eating them.
The first time I made these for a summer potluck, my friend Sarah actually licked the foil wrapper clean. I've since learned to make a double batch because people hover around the pan until the very last square is gone. Something about that combination of textures turns perfectly rational adults into joyful snack sneaking children.
Ingredients
- Graham cracker crumbs: These form the foundation, so crush them into fine, even pieces for a crust that holds together beautifully
- Unsalted butter: Melted completely so every crumb gets coated in buttery richness
- Granulated sugar: Just enough to enhance the natural sweetness of the crackers without making them cloying
- Semi-sweet chocolate chips: They melt into the perfect fudgy layer that balances the sweet marshmallows
- Mini marshmallows: Their smaller size means more surface area gets golden and toasted in the oven
Tired of Takeout? 🥡
Get 10 meals you can make faster than delivery arrives. Seriously.
One email. No spam. Unsubscribe anytime.
Instructions
- Prep your pan and oven:
- Preheat to 350°F and line your 8x8 pan with parchment, letting the edges hang over like handles
- Make the crust:
- Mix crumbs, melted butter, and sugar until it looks like wet sand, then press firmly into the pan bottom
- Bake the base:
- Let the crust bake for 8 minutes until it smells like toasted honey and feels set to the touch
- Add the chocolate:
- Scatter chips over the hot crust and return to oven for just 2 minutes until they turn shiny and soft
- Spread the layer:
- Gently swirl the melted chocolate into an even blanket using light, careful strokes
- Top with marshmallows:
- Scatter mini marshmallows across and press them down slightly so they nestle into the chocolate
- Toast to perfection:
- Bake 10 to 12 minutes until the marshmallows puff up and turn golden brown in spots
- The crucial cooling step:
- Let cool completely, then chill for an hour so you can cut clean squares instead of messy blobs
 Pin It
 My niece now requests these for every birthday instead of cake, which I consider the highest compliment possible. There's something about pulling apart a warm bar and seeing those strings of marshmallow stretch that makes people smile without even realizing it.
Making Ahead
I've discovered these bars actually improve after sitting in the refrigerator overnight. The flavors meld together and the texture becomes even more satisfyingly chewy. Just bring them to room temperature for 20 minutes before serving so the chocolate softens slightly.
Serving Suggestions
A light dusting of sea salt over the top just before serving cuts through the sweetness beautifully. I've also served them alongside vanilla ice cream for an over the top dessert that makes people's eyes widen when the plate hits the table.
Get Creative
The basic formula is incredibly forgiving once you understand how the layers work together. Try stirring crushed pretzels into the crust for a salty twist or swapping in milk chocolate if you prefer a sweeter profile.
- Drizzle with caramel sauce before adding the marshmallows for an even more indulgent version
- Press a few graham cracker pieces into the top for extra crunch and visual appeal
- Serve them slightly warmed in the microwave for about 15 seconds to recreate that fresh from the campfire experience
 Pin It
 Whether you are avoiding winter weather or just need a nostalgic treat, these bars deliver campfire happiness right from your kitchen.
Recipe FAQs
- → How do I get clean cuts through the marshmallows?
Chill the bars in the refrigerator for at least one hour before slicing. Use a sharp knife warmed under hot water and wiped clean between each cut. The cold firms up the marshmallows and chocolate, preventing them from pulling apart.
- → Can I make these ahead of time?
Yes, these bars keep exceptionally well. Store in an airtight container at room temperature for up to 3 days, or refrigerate for up to a week. Bring to room temperature before serving for the best gooey texture.
- → What chocolate works best?
Semi-sweet chocolate chips provide a balanced sweetness that complements the marshmallows. For variations, try milk chocolate for a sweeter bar, dark chocolate for intensity, or chocolate bars chopped into pieces for larger melted pockets.
- → Can I use a different pan size?
An 8x8-inch pan creates thick, rich bars. A 9x13-inch pan will yield thinner squares with about 24 servings. Adjust baking time slightly—the marshmallows will toast faster in a thinner layer, so check after 8 minutes.
- → How do I know when the marshmallows are properly toasted?
Look for golden-brown color on the peaks of the marshmallows. They should be puffed and slightly glossy. Watch closely after 8 minutes, as they can go from golden to burnt quickly. A light broil for 1-2 minutes can add extra char if desired.
- → Can I make these dairy-free?
Use vegan butter or coconut oil for the crust, dairy-free chocolate chips, and vegan marshmallows (many brands use plant-based gelatin alternatives). The texture and flavor remain remarkably similar to the traditional version.